#adReader-supported: we may earn a commission if you buy through our links, at no extra cost to you. It never decides a ranking. How we pick · Disclosure
Manual figures as of Sep 21, 2026. Every hole size, bag count and cure time on this page was read from the manufacturer's own install manual or installation page on that date, and each is linked. Makers revise manuals without notice: confirm on the linked page (and the paper manual in your box) before you dig, and tell us if a figure has changed.
Hole and concrete by brand
| Anchor system | Hole | Concrete | Rebar | Cure | Source |
|---|---|---|---|---|---|
| Goalrilla 9-inch anchor (all Goalrillas) | 16 in diameter, 48 in deep | Eleven 80-lb bags (12-13 recommended) | Yes (kit) | 72 h minimum; mount day 5 | Goalrilla installation guide |
| Goalrilla B1002 manual (older) | 16 in diameter | Nine 80-lb bags | Four #3 x 40 in | 72 h (3 days) | B1002 anchor manual |
| Escalade 7-inch anchor (Silverback SB60/SB54/SBX, Goaliath Ignite/Prodigy) | 16 in diameter, 36 in deep; 20 in form at top | Nine 80-lb bags | Four #3 x 30 in | 72 h minimum; assemble day 5 | Silverback SB60 manual |
| Lifetime in-ground systems | Round, 18-24 in diameter, 21-24 in deep | 420-640 lb | Not stated | 3 days (72 h) | Lifetime assembly guide |
| Lifetime bolt-down systems | 21 in square, belled, 30-48 in deep | 1,040-1,680 lb | Not stated | 3 days (72 h) | Lifetime assembly guide |
| Pro Dunk Gold (direct only) | 20 in square, 3 ft deep | 15-20 80-lb bags, 3,000 psi+ | Not stated | Not stated on page | Pro Dunk Gold page |
Those are the makers' numbers, read on 2026-09-21 and linked in the sources; the manual in your box overrides all of them. The procedure below follows the Silverback SB60 and Goalrilla manuals, which describe the same steps.
Before day 1: 811, the site, the tools
Call 811. Both manuals open with it: “Before digging hole for anchor system, check for buried power, gas, water, and telecommunication lines! Failure to do so could result in serious or fatal injury!” 811 is the free national service; contact it a few business days before digging, wait for the utilities to mark, and dig carefully around the marks. Pick the spot with the overhang in mind: the anchor sits the overhang distance behind where the rim will hang (27 inches at 10 feet for the SB60, per its manual), the Silverback manual wants 18 inches minimum of rear clearance behind the pole, and Goalrilla recommends the footing be independent of the court slab with an expansion joint if you pour both. Where to put a basketball hoop covers the garage door and the street. Tools from the Silverback manual: nine 80-lb bags, a post-hole digger (or an auger rental), a wheelbarrow, a garden hose, a level, a tape measure, a 15/16-inch wrench and socket, and a concrete form for the top 4 inches (cardboard tube or a 2x4 box).
Day 1: dig, set the anchor, pour
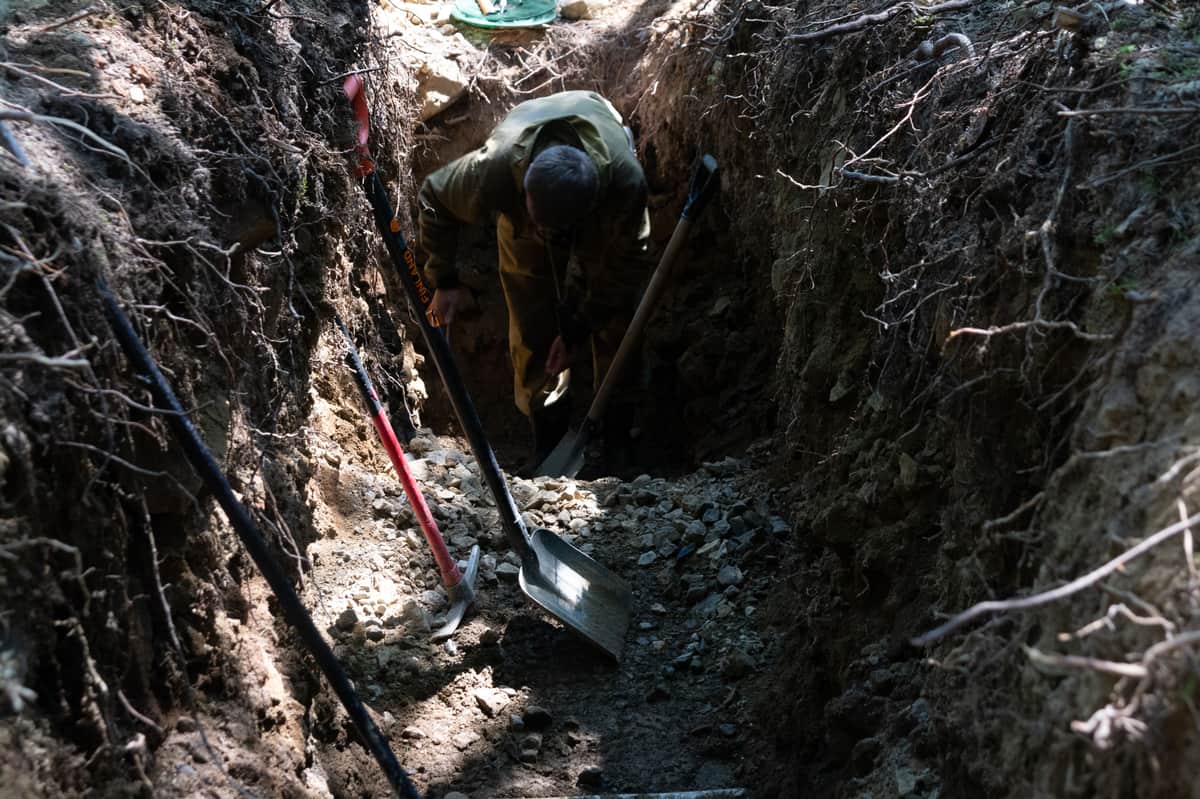
- Dig the hole to the manual's diameter and depth. If you hit rock you cannot get through, the Silverback manual says to call a contractor rather than shorten the hole.
- Assemble the anchor: thread the bottom nuts onto the J-bolts, pass the bolts through the plate, add the top nuts. The bottom nuts are embedded forever; the top nuts level the pole later.
- Set the form for the top 4 inches so the concrete finishes at court level (the Silverback manual specifies 20 inches diameter at the form).
- Mix and pour to about 18 inches below court level. Follow the bag's water ratio; QUIKRETE's data sheet puts 6-9 pints per 80-lb bag.
- Push the four rebar into the concrete 8 inches apart in a square at the center of the hole, then pour to court level.
- Push the anchor into the concrete, agitate it to work out voids, and immediately level and square the plate to the court with a level. Clean concrete off the exposed threads.
Days 2-4: cure
“Let concrete stand for a MINIMUM of 72 hours” (Silverback; Goalrilla says the same and recommends day 5 for mounting). Goalrilla's guide adds cold-weather rules: do not pour below 40°F, use hot water and a curing blanket if you must. Keep the anchor bolts covered so nobody trips on them.
Day 5: assemble
The Silverback manual says the assembly “requires four adults”; Goalrilla's anchor manual says placing the post “requires at least four capable adults” because “pole will want to lean while attempting to stand it up on anchor bolts.” The order in both: build the pole and arm assembly on the ground, stand it on the bolts, thread the washers and nuts, plumb the pole with the leveling nuts and a post level, then, with at least three people, raise the backboard onto the arms, attach the rim and net, install the actuator, and cycle the height once. Finish with the pads.
Our picks for this
What the manuals tell you to buy
Concrete with a published yield, a post level for the plumb step, and the two anchor kits you would buy to move a hoop later. Specs link to the makers.
 Stock photo
Best bagged concrete for a hoop footing
QUIKRETE Concrete Mix (No. 1101), 80 lb
Warranty: not published8.9/10The 80-lb bag the manuals count in; 0.60 cubic feet per bag per QUIKRETE's data sheet.
Check price · Amazon#ad · Price set by Amazon · Disclosure for the link to QUIKRETE Concrete Mix (No. 1101), 80 lb
- Stock photo
Best post level
Johnson Level 175-O Post & Pipe Level
1-yr warranty9.5/10Straps to the pole and reads plumb on two faces while you turn the leveling nuts.
Check price · Amazon#ad · Price set by Amazon · Disclosure for the link to Johnson Level 175-O Post & Pipe Level
- Stock photo
Best anchor kit for Goalrilla
Goalrilla 9" Basketball Hoop Anchor Kit (B1002)
90-day warranty8.2/10The Goalrilla plate, bolts and rebar; the second one you buy to move the hoop.
Check price · Amazon#ad · Price set by Amazon · Disclosure for the link to Goalrilla 9" Basketball Hoop Anchor Kit (B1002)
- Stock photo
Best anchor kit for Silverback / Goaliath
Silverback 7" Basketball Hoop Anchor Kit (B1030)
Warranty: not published8.2/10The Silverback / Goaliath plate, bolts and rebar; 7-inch spacing, not 9.
Check price · Amazon#ad · Price set by Amazon · Disclosure for the link to Silverback 7" Basketball Hoop Anchor Kit (B1030)
Direct-bury hoops
The Silverback NXT and Goaliath GoTek in-grounds and the SB54iG have no anchor plate: the pole itself is set in the concrete, and the NXT pages describe concrete poured inside the pole too. Escalade's product pages do not publish their hole sizes; the paper manual does. The trade for the lower price is that the hoop cannot be unbolted and moved. Anchor kits explained.
When to hire it
A 72-inch board, a 745-lb Mega Slam crate, a driveway on rock, or two adults instead of four. Thumbtack's national average for basketball hoop installation is $130-$255 with in-ground at the high end; Goalrilla and Lifetime both offer professional installation. Installation cost has the line items.
How we scored this
Units we claim to have tested: 0
Everyone in this category says they tested twenty hoops. We haven't stood up any of them, and we say so on every page. What we do instead: read the maker's published backboard, pole, overhang and adjustment specs; open the install manual and quote the hole size, bag count and cure time; quote the warranty term from the maker's own page or manual with the date we read it; and note the failure patterns owners report (base cracking, backboard fogging, two-piece pole lean) as reported, never as confirmed. Every figure links to where it came from.
Scores are editorial judgments from that documented research, not lab results. Commissions never set a score or decide a pick. The rubrics and their weights are published.
Questions
Frequently asked
How long does it take to install an in-ground basketball hoop?
Five days by the makers' manuals: dig and pour on day 1, cure days 2-4 (72 hours minimum), assemble on day 5. The work itself is a few hours on day 1 and a few on day 5 with four adults.
How deep do you dig for an in-ground basketball hoop?
Goalrilla: 16 inches in diameter, 48 inches deep. Silverback and Goaliath (7-inch anchor): 16 inches in diameter, 36 inches deep. Lifetime in-ground systems: 21-24 inches deep, 18-24 inches in diameter. See how deep to dig.
How many bags of concrete for a basketball hoop?
Eleven 80-lb bags for Goalrilla's current guide (nine in the older B1002 manual), nine for the Silverback SB60 manual, 420-640 lb for Lifetime in-ground systems, 15-20 for Pro Dunk Gold. How much concrete has the math.
How many people does it take to install an in-ground hoop?
Four adults on assembly day, per the Silverback SB60 and Goalrilla anchor manuals. Goalsetter's hinged anchor reduces it to two or three.
Do I need to call 811 before installing a basketball hoop?
Yes. It is free, the makers' manuals require checking for buried lines, and 811 asks for a few business days' notice before you dig.
Keep reading
Related on Rim & Rebound
- How deep to digHole depth by brand, plus frost.
- How much concreteBags by hole size, with the math.
- Anchor kits explained9-inch, 7-inch, sleeve and direct bury.
- Installation costDIY materials vs hiring it.
- Where to put a basketball hoopPlacement before the dig.
- Best in-ground hoopsWhat to put on the anchor.
Receipts
Sources
- Silverback SB60 (B5402W) owner's manual — anchor installation, assembly and Limited 7 Year Warranty (PDF hosted by Lowe's; read 2026-09-21)
- Goalrilla — Basketball Hoop Installation guide (read 2026-09-21)
- Goalrilla Anchor Kit B1002 — Anchor System Installation Instructions (PDF hosted by BasketballGoalStore; read 2026-09-21)
- Lifetime — "Basketball Hoop Assembly: In-Ground and Bolt-Down" (read 2026-09-21)
- Pro Dunk Hoops — THOR Gold (Pro Dunk Gold) product page (read 2026-09-21)
- 811 Before You Dig — the free national call-before-you-dig service (read 2026-09-21)
- QUIKRETE — Concrete Mix No. 1101 data sheet (yields per bag, water, strength; read 2026-09-21)
- Thumbtack — basketball hoop installation cost (national average, updated Apr 14, 2026; read 2026-09-21)
- Goalsetter — MVP Adjustable Basketball Hoop product page (read 2026-09-21)
We haven't stood one of these up ourselves and we don't pretend to. Units we claim to have tested: 0. Specs come from the maker's own product pages (linked on every product), install figures from the maker's manual or installation page with the date we read it, and warranty terms from the maker's warranty page or manual. Amazon prices change often, so we don't print them. Where a figure isn't published, we say so. Read how we pick.