#adReader-supported: we may earn a commission if you buy through our links, at no extra cost to you. It never decides a ranking. How we pick · Disclosure
Manual figures as of Sep 21, 2026. Every hole size, bag count and cure time on this page was read from the manufacturer's own install manual or installation page on that date, and each is linked. Makers revise manuals without notice: confirm on the linked page (and the paper manual in your box) before you dig, and tell us if a figure has changed.
First: which kind do you have?
Everything about this job follows from one look at the bottom of the pole.
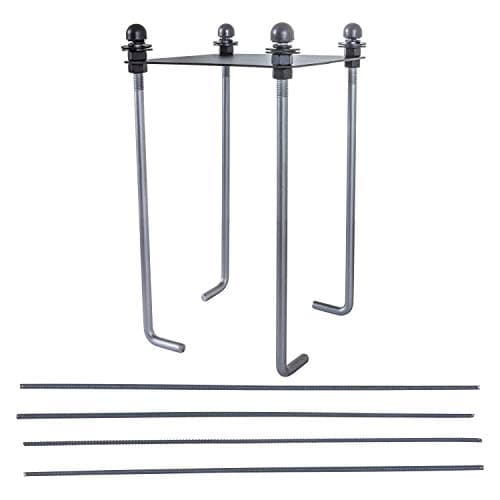
Bolt-down means a steel anchor plate with four J-bolts was cast into the footing, cured, and the pole bolted onto the studs that protrude. You will see four nuts, usually with levelling nuts beneath the pole base plate, and a plate roughly flush with the slab. Goalrilla's 9-inch kit, Escalade's 7-inch Silverback and Goaliath kit, and Lifetime's bolt-down systems all work this way. Anchor kits explained covers which plate is which.
Direct-bury means the pole itself went into the hole and concrete was poured around — and often inside — it. The pole emerges from the concrete with no plate and no nuts. Escalade's NXT line and several Lifetime in-ground systems are direct-bury, and so are most older hoops.
Removing a bolt-down pole
- Lower the rim to the bottom of its range. Less weight up high, and the board comes off at a reachable height.
- Take the net, rim and backboard off first, in that order, with the board supported before the last bolts come out. A 60-inch glass board is a two-person lift minimum and a 72 is a four-person one — the makers' own assembly instructions say three to four adults, and removal is the same job backwards.
- Remove the extension arms and the pads. Keep the hardware in a labelled bag if the hoop is being reinstalled.
- Support the bare pole — ratchet straps to a vehicle or two people — before touching the base nuts. Even a bare pole is tall and heavy and will go over.
- Undo the four nuts and the levelling nuts. Expect them to be seized after a few winters; a penetrating spray, a long socket and patience beat rounding them off. If a stud shears, that is survivable — the studs stay in the footing anyway.
- Lift the pole clear and lay it down. Done. The plate and studs stay in the concrete.
Two or three hours with two people, most of it the board. Then cap the studs or cut them flush and grind them, because four threaded studs standing proud of a driveway are a genuine hazard.
Removing a direct-bury pole
There is no clean version of this. The pole is encased in concrete, and the published figures tell you what you are up against: Lifetime's assembly guidance for direct-set in-ground systems calls for a hole 21 to 24 inches deep and 18 to 24 inches in diameter with 420 to 640 lb of concrete, and its 54- and 60-inch bolt-down listings quote at least 1,040 lb of mix. Goalrilla's guide specifies a 16-inch hole 48 inches deep with eleven 80-lb bags.
Three realistic routes:
- Cut the pole at grade. An angle grinder with a metal cutting disc, or a reciprocating saw with a bimetal blade. Fast, cheap, and leaves the footing and a steel stub in the ground. Grind the stub below the surface and patch over it. This is what most people actually do.
- Cut below grade. Excavate 6 to 12 inches around the pole, cut it there, and backfill. More work, but nothing is left at the surface and the patch is invisible.
- Break out the footing. A rotary hammer or a jackhammer, several hundred pounds of rubble to dispose of, and a hole to backfill and patch. Only worth it if that exact spot has to be clear — for new concrete, a planting bed, or a utility run.
The pole itself is scrap steel either way. A cut direct-bury pole cannot be reinstalled: it is shorter than designed and has no base plate.
What to do with the footing
If you cut the pole and leave the footing, the concrete is inert and will not cause a problem — it is a block of concrete below your driveway or lawn. The things to deal with are at the surface: grind any steel flush or below, and patch.
If the footing sits in a lawn, a few inches of soil over the top will take grass. If it sits in a driveway, a bagged concrete patch over a ground-flush stub is a 20-minute job — and if the removal is part of resurfacing the slab anyway, breaking the footing out is easier while the contractor has equipment on site.
Relocating it to a new house
Only a bolt-down hoop can genuinely move, and the move is a second install rather than a transplant. You need: a new anchor kit (the old plate stays in the old footing), a new hole dug to the manual's dimensions, the mix for it, and the 72-hour cure before the pole goes back on.
That is three or four hours of labour plus the price of a plate and nine to eleven bags of concrete — against several hundred to several thousand dollars for a new system. It is also the strongest argument for buying bolt-down in the first place: nobody plans to move, and people move. How long an install takes has the day-by-day, and how much concrete has the bag counts by brand.
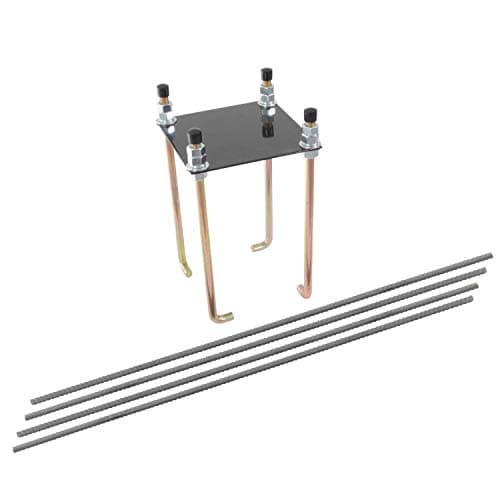
Critically, the plate pattern is not interchangeable. Goalrilla's kit has 9 inches between anchor-bolt centres and fits the DC, CV, GS and FT systems; Escalade's Silverback kit has 7 inches between centres, fits the SB and SBX systems, the Ignite and the Prodigy, and its own product page states it is not compatible with Goalrilla. Order the one that matches the hoop you are moving, not the one that is cheaper.
Before you start
- Call 811 if you are digging. Free, and the markout matters as much coming out as going in.
- Eye and ear protection for any cutting. An angle grinder on a steel pole throws sparks a long way, and a driveway is a hard surface to catch a kickback on.
- Get the glass down before anything else. Tempered glass fails all at once. Do not grind or hammer anywhere near a mounted board.
- Three or four adults for a 60- or 72-inch board. The makers' own numbers for putting one up apply to taking it down.
What a relocation needs
Our picks for this
The three things a relocation actually costs
The old plate stays in the old footing, so a move needs a new one that matches the hoop's bolt pattern, plus mix for a new hole. The patterns are not interchangeable.
Best anchor kit for Goalrilla
Goalrilla 9" Basketball Hoop Anchor Kit (B1002)
90-day warranty8.2/10The 9-inch pattern: DC, CV, GS and FT Goalrilla systems. Buy this before you dig, because it goes into the wet concrete.
$149.95Amazon#ad · Price as of November 3, 2026 · Disclosure for the link to Goalrilla 9" Basketball Hoop Anchor Kit (B1002)
Best anchor kit for Silverback / Goaliath
Silverback 7" Basketball Hoop Anchor Kit (B1030)
Warranty: not published8.2/10The 7-inch pattern: Silverback SB and SBX, Goaliath Ignite and Prodigy. Its own product page states it is not compatible with Goalrilla.
$109.95Amazon#ad · Price as of November 3, 2026 · Disclosure for the link to Silverback 7" Basketball Hoop Anchor Kit (B1030)
 Stock photo
Best bagged concrete for a hoop footing
QUIKRETE Concrete Mix (No. 1101), 80 lb
Warranty: not published8.9/10The standard footing mix, with yield per bag published so nine to eleven bags can be checked against the hole you have dug.
Check price · Amazon#ad · Price as of November 3, 2026 · Disclosure for the link to QUIKRETE Concrete Mix (No. 1101), 80 lb
How we picked
What earns a pick on this page
Every pick here is built from figures you can check for yourself: the maker's published backboard, pole, overhang and adjustment specs; the hole size, bag count and cure time printed in its install manual; the warranty term in the maker's own wording, exclusions included, with the date we read it; and the failure patterns owners report (base cracking, backboard fogging, two-piece pole lean), which shape the “skip this if” line. Every figure links to where it came from.
Those figures go through one fixed rubric, so an 8.1 here means the same thing as an 8.1 anywhere else on the site and the top pick is the one that earns it for the driveway it is named for. Commissions never set a score or decide a pick. The rubrics and their weights are published.
Questions
Frequently asked
Can you remove an in-ground basketball hoop?
A bolt-down one, yes — take the board and rim off, support the pole and undo four nuts, and the pole lifts clear in an afternoon. A direct-bury one cannot be removed intact: the pole is encased in concrete, so the practical options are cutting it at or below grade, or breaking out the footing.
How do I know if my hoop is bolt-down or direct-bury?
Look at the bottom of the pole. Four nuts on protruding studs with a steel plate flush to the concrete means bolt-down. A pole emerging straight out of the concrete with no plate and no nuts means direct-bury.
Do I have to dig out the concrete footing?
Usually not. Cutting the pole at or just below grade and grinding the stub flush leaves an inert block of concrete under the surface, which causes no problem. Break it out only if that exact spot has to be clear — for new concrete, a planting bed or a utility run.
Can I move a basketball hoop to a new house?
If it is bolt-down. The old anchor plate stays in the old footing, so you buy a second anchor kit matching the hoop's pattern, dig and pour a new footing at the new address, wait the 72-hour cure and bolt the same pole and board back on. Three or four hours of labour plus a plate and nine to eleven bags of mix.
Can I pull the pole out with a truck?
No. The footing can weigh 500 to over 1,000 lb per the makers' own concrete figures, which is more than a vehicle's traction, and a strap or pole letting go under that load is dangerous. Cut it instead.
Keep reading
Related on Rim & Rebound
Receipts
Sources
- Goalrilla — 9" Basketball Hoop Anchor Kit (B1002) product page (read 2026-09-21)
- Goalrilla Anchor Kit B1002 — Anchor System Installation Instructions (PDF hosted by BasketballGoalStore; read 2026-09-21)
- Goalrilla — Basketball Hoop Installation guide (read 2026-09-21)
- Silverback — 7" Basketball Hoop Anchor Kit (B1030) product page (read 2026-09-21)
- Silverback SB60 (B5402W) owner's manual — anchor installation, assembly and Limited 7 Year Warranty (PDF hosted by Lowe's; read 2026-09-21)
- Lifetime — "Basketball Hoop Assembly: In-Ground and Bolt-Down" (read 2026-09-21)
- Amazon listing — Lifetime 90568 In-Ground 54-Inch Tempered Glass hoop: 3/8 in glass, crank adjust, bolt-down pole and concrete requirement (live Amazon listing, read 2026-10-04)
- Amazon listing — Lifetime Mammoth 90964 Bolt-Down 72-Inch hoop: 3/8 in glass, Mammoth Lift and bolt-down pole (live Amazon listing, read 2026-10-04)
- QUIKRETE — Concrete Mix No. 1101 data sheet (yields per bag, water, strength; read 2026-09-21)
- 811 Before You Dig — the free national call-before-you-dig service (read 2026-09-21)
Every figure above is a published one you can click and check. Specs come from the maker's own product pages (linked on every product), install figures from the maker's manual or installation page with the date we read it, and warranty terms from the maker's warranty page or manual. Buy buttons go straight to the current Amazon listing, so the price you see is today's. Where a maker leaves a figure off the page, the card says “not published” rather than guessing. Read how we pick.